How to import and export contacts to/from Outlook using vCard Wizard
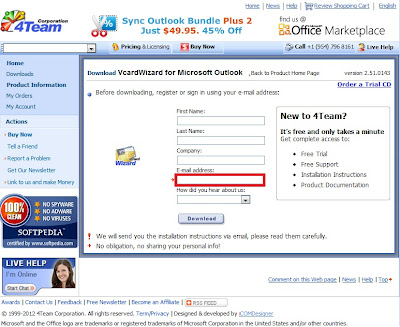
vCard Wizard allows you to import vCard format files to the chosen Microsoft Outlook Contact Folder and Export any Contacts Folder to the vCard format.
Below are step by step instructions on how to import/export contacts using vCard Wizard program.
- Please use the following link to download and install vCard Wizard on your computer, if you have not done that already: http://www.vcardwizard.com/try_vcardwizard.asp
- Please use the e-mail address to which we will send you an automatic e-mail with the installation instructions triggered by pressing the DOWNLOAD button.
- When vCard Wizard is installed on PC, please perform the following steps:
- Double-click on vCarWizard to start the program and Outlook will pop-up.
- If you wish to export your Outlook contacts to vCard format file please select 'Export contacts to Vcard'
- New window will show up with the following parameters:
- 'Export contacts from folder:' allows you to select a calendar folder where your contacts are located.
- 'Save vCard files to:' gives you the option to choose vCard file(s) destination folder.
- 'Format file:' let you choose between vCard 2.1 and vCard 3.0 format. Please read more about vCard formats using this link.
- 'Encoding:'
- Export selected contacts only, Export all contacts into one vCard file, Open folder with exported files check-boxes.
- If you wish to import your vCard file to Outlook contacts please select 'Import contacts from Vcard'
- 'Import vCard contacts from:' grants you to select folder with the vCard format file(s)
- 'Save contacts to:' allows you to choose Outlook folder location where information should be stored.
- ''Resolution of duplicates' gives you 3 options:
- Keep both contacts (allow duplicates to be created)
- Overwrite duplicates
- Keep original contacts (do not import duplicates)
- 'Open folder with imported items' check-box opens Outlook contact folder.
How to use Send2
To download Send2 please go to: http://send2.4team.biz/
Click on “Try the new updated Send2 for FREE Now!”, enter your email address and press the “Download” button:
After installation you will see Send2 icon on the Outlook toolbar:
To start using Send2, you need to create Distribution List first. You can create a Distribution List by selecting 1 of 3 buttons:
After you click “Create new Distribution List” button, new dialog will appear. You need to click “Select Members” button and select recipients you want to add to the list.
You can also create a Distribution List using this button:
After you select this button, you will receive a warning dialog:
When Send2 add recipients to a Distribution List you will be able to enter Distribution List name:
You can add new recipients to existing Distibution List by clicking “Add to Existing Distrubution List” button:
To send a group email right click on the Distrubution List, select Send2 and select TO, CC or BCC:
Tip: Send2 Distribution List is placed in MS Outlook Contacts folder.
After you add Distribution List you will need to enter email body text and press “Send” button:
You can find Send2 options in New Email window:
Insert button allows to insert full name, first name and other in the email.
“Mode” button allows to select how to send group emails:
“Options” button opens a new tab:
“Options” button in Send2 menu will take to the same tabs as “Options” button in a New Email window:
“About Send2”: dialog will display information about the Send2 version you use, and options to: Deactivate the program, Buy Online, Check for Updates, Report a Problem, contact Tech Support or find the online documentation.